14 October 2009

Good Enough Curtains

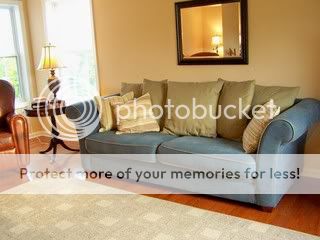
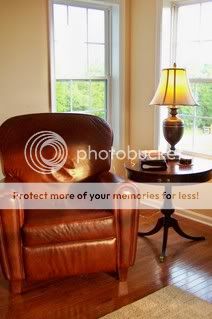
I know that I've shown you this corner of my family room about eleventy-hundred times. At one point it was my quiet time/blogging spot. When we built this house, I had an image in my head of a bright corner with a couple of windows and a comfy chair.

Can I just tell you how much I hate trying to photograph windows? It took me 3 days to get these crummy pictures. Either the room is too dark or it looks like the Mother Ship is landing outside my window.


This is what it looked like before I hung the fabric. That "For Sale" sign that you see out the window isn't for our house. It's for the never-gonna-sell-in-this-economy lot next door. Who wants to come be my neighbor? Pretty please?

Something about this corner has bugged me since we moved in a year ago. It never felt quite right. Then as I was hanging the curtain rods, I realized that THE WINDOWS ARE DIFFERENT SIZES! Not a big deal but I can't believe it took me over a year to figure that out.

A few months back, I got my hot little hands on some Dupioni Silk fabric from Fabric.com for really cheap (like $5.00/yard cheap). Some of you got in on that deal too. I grabbed 12 yards of this beautiful khaki/gold/green silk. LOVE IT! Even at $10/yard, it's a great deal.

I used The Nester's Fold, Clip and Poof Technique, minus the poof. I tried the poof. It looked good, but I preferred no poof. The edges are completely raw but even the selvage of this fabric is pretty. I may cover it up with some pretty fringe at some point. But then again, maybe not.

Do you have any curtains that you usually look at from the side? This rod is primarily seen sideways from the kitchen. It always bugs me a little when the the curtains kind of hang away from the walls. Here's a little tip for you.


Take one of your ring clips and turn it around the corner so that it's hanging on the bracket rather than the rod. Then run the rest of your clips on the rod like normal.

It's a dumb little thing that bugs me and this trick fixes it right up. See?

One more picture just because I love it so much. I've got two more windows to do in this room but they'll have to wait until the painting is done.

~~~~~~~~~~

DIY Day is still going strong! Scroll down or click here to see over 250 project posts and link up your own. You might win a fantastic prize from Madison Reese Designs!

Today is the last day to enter our giveaway from Rondo Room. Winner announced tomorrow.

Speaking of giveaways, did you see that Remodeling Guy is giving away an Ipod Touch? My Walkman (my what????) just broke so I'm going to try and win this! Get yourself over there and get entered to win.

07 October 2009

How to Decorate a Coffee Table

Are you the type of person who instinctively knows how to arrange your bits and baubles on a coffee table (or bookshelf, or sideboard, or whatever) in a way that looks beautiful? Or are you the type of person who arranges a bunch of junk on your table and it looks like, well, a bunch of junk?

Country Living

I would say that I'm somewhere in the middle. Over time, I've learned how to arrange my junk in a way that looks pretty and doesn't scream "Thrift store junk for sale!!!!"

I know. I'm deep. I could have been working on world peace and instead I was arranging tsotchkes.

One of the ways to get better at the art of arranging is to copy displays by people who know what they're doing. I'm not suggesting that you go to Pottery Barn and buy everything in their beautiful display. But it is helpful to find a picture from a catalog and look at the size, scale and type of things in the display and try to create something similar with stuff you already have.

For example, here the Pottery Barn version:

Let's see...big tray, stacked books, small flower arrangement and some other little junk. Got it.

Here's my version...

  • Big rattan tray from the thrift store (I honestly have no idea why I bought this. I think I was planning to turn it into a table but it's just been sitting in the basement.)
  • Lots of pretty books from my grandpap
  • Lid from a funky green urn...Somehow I managed to lose the urn but I still have the lid. How does that happen?
  • Glass vase filled with beach pebbles and fake flowers. I'm not usually a huge fan of fake flowers, but these sunflowers aren't too bad. And mixed with some nice fake leaves, they're totally tolerable.
  • Pinecone and candles

See how the size, shape and scale of the things in my display are similar to the PB picture? I didn't buy anything new. I just scrounged around through what I already had.

Next one...Ballard coffee table

Hmmmmm...Ceramic urn with sunflowers, some kind of basket and a wooden bowl. OK, let's try this...

My version...

  • Galvanized metal ice bucket stuffed with faux leaves
  • Wooden dough bowl filled with pinecones
  • Bronze bowl/urn thing from Nester's Swap Meet

Again, the size and scale are similar even though the actual stuff is totally different.

Last one...Pottery Barn table


This one's easy...Wooden tray and metal bowl filled with apples. Stack of magazines with a rock. You gotta love it when PB starts decorating with rocks. Recession anyone?

My version:

  • Wooden tray from TJ Maxx...I grabbed it for $7.99 a couple of months back.
  • Bread basket filled with pinecones...That silly basket is precious to me because it came home with me from our honeymoon.
  • Stack of magazines
  • Rock from the backyard

I think this last one is my favorite. Mostly because it stands that greatest chance of surviving my boys and because it allows me to claim that my stacks of magazines are display worthy.

Now go arrange something.

DIY Day is still going strong! Scroll down or click here to see over 250(!) projects that have been linked up so far. Winner of the giveaway from V & Co on Etsy will be announced tomorrow so you can still enter your project.

You can still enter our giveaway from Rondo Room! Just click here and leave me a comment!

28 September 2009

Quick Fall Decorating

Don't forget! DIY is moving to Tuesdays starting this week! That means the post will go up tonight at 10pm (eastern time)! Get ready!!!

My fall decorating is usually pretty quick and easy and uses things I already have. By the time I get settled into fall, I start thinking about Christmas. So quick and easy works for me in the fall.

Some pumpkins and a pedestal on the hearth. Did you hear that there's a pumpkin shortage this year? You'd never know it by looking at the orange speckled fields on the farm next door.

My new favorite fall blanket. I love the color, pattern and fringe. Quite a deal from Overstock at $21.49 for a set of 2. One for me and one for a gift.

Some faux fall leaves in my favorite urn. When the fakes look good, one stem goes a long way. I found these ones a couple of years ago and use them every year. They were a little more expensive, but totally worth it.

A metal bowl that I snagged at The Nester's swap meet. Whose bowl was this? I love it!!! And I double-dog dare you to tell me that I should have used an odd number of candles in it. I'll be forced to throw a fake miniature pear at you.

Do you foof things up for fall or do you go straight from summer to Christmas?

Some more fall foofing:
Fall in 5 Minutes @ Nesting Place
Fall Decorating and More Fall Decorating @ Junk Garden Girl
Fall Nesting Tips #1, #2 and #3 @ The Inspired Room
Fall Door Decor @ Thrifty Decor Chick
Fun with White Pumpkins @ My Sweet Savannah

~~~~~~~~~~

The winner of the giveaway from last week's DIY Day is Michelle from The McCray-Z Life who linked up her kitchen island makeover post. You have to see the before pictures. Wow!

Many, many thanks to RHB Designs for providing a $40 gift certificate to her fantastic etsy shop! She makes the most beautiful hand-stamped jewelry. Check her out!


12 July 2009

Price My Space

That Nester. Always coming up with brilliant ideas! I love seeing what everyone has spent on the things in their homes. I guess I'm just nosey. If you're visiting from Nesting Place, be sure to enter my giveaway from Monkey See Boutique.


I was hesitant to share my family room because I'm still in the process of implementing a beautiful redesign done by Layla from The Lettered Cottage. If you want to see her plans, click here. But, as The Nester says, "It doesn't have to perfect to be beautiful."


I'll start out with something that I love.

  1. We purchased this green sofa off the showroom floor at Ethan Allen about 6 years ago. We paid about $1,200 for it. Best furniture money we ever spent. It has held up so well to boys and butts. I don't regret investing in a good sofa for one second.
  2. The Ikea ottoman for $69. Blah. It has served it's purpose but will soon be replaced with a beautiful coffee table made from an old door. I can't wait to show you!!!!


For contrast, here's my blue sofa. I call it big, blue ugly. I bought this sofa about 10 years ago as a part of a set that included a chair-and-a-half that's now in my son's room. The set cost about $1,000. I am so done with this sofa but we're not in the position to replace it now. Those goofy flared arms take up so much space and it just doesn't work with the other pieces we have.

It was definitely a lesson in sticking to neutral colors and classic lines for your major pieces of furniture. Lesson learned. I'm working on a slipcover for it now. If you want to see why the back cushions are green, click here.


  1. The leather recliners were about $950 each 7 years ago. We bought them from a North Carolina furniture retailer (Rose Furniture) that has since gone out of business. I'm basically happy with them but, again, I wish I had gone for a slightly more classic shape like rolled-arms.
  2. Goodwill side table - $5.00. It will get a coat of paint in the next few weeks.
  3. Goodwill dresser - $25.00. It was really beat up and I spent at least 15 hours repairing and painting it. If you want to see "before" pictures and the whole process, click here.


  1. Painted black side table - $10.00 at the fleatique store. Click here to see the "before" pics.
  2. Wicker chair - $15.00 at the fleatique. It used to be a yucky green. Before pics here.
  3. No sew pillow - $2.00 in supplies.


The area rug is one of my favorite things in the room. It's a large, custom sized rug (about 11'x13'). I simply bought a piece of carpet from a carpet store and had them bind the edge for me. Most carpet stores will do the binding for you for $2-$3 a linear foot. The whole thing cost me less than $300 and it's still going strong after 8 years.


  1. These were my first window mistreatments. The fabric that I used was about $3.00/yard on clearance and the wood and brackets were about $10. Total cost? About $15.
  2. The mantle decorations were both thrift and splurgy. The boat was a splurge (for me) at about $65. It came from Whiteflower Farmhouse and they have smaller, less expensive versions. Love it!!! The frame came from someone's garbage. Cost? $0. The candlesticks were on clearance at Kohls a few years ago. $4.00 each.

    This little corner table is one of my favorite pieces. $25 at the fleatique. Do you notice anything odd? I didn't paint it!

    Total cost for this room? Around $4,200 plus some misc costs over the years for accessories that have come and gone and come and gone.

07 July 2009

My Summer Mantle

My poor, beautiful mantle is always neglected in the summer. Fall, Christmas and winter are prime mantle-time. But summer? Not so much.

But this year? Much mantel love.

That glorious driftwood sailboat came from my friends at White Flower Farmhouse. Isn't it gorgeous? I've put it in at least 17 places in my house, but this is my favorite spot. If I had a piece of beautiful coral, it would be up there too. Maybe I'll snag one when I'm at the beach.

I love the way the empty frame highlights the stonework without being heavy. That frame was picked out of someone's garbage about a year ago. A quick coat of white paint and it was ready for business.

Psst...A little secret for those of you who ask how I keep my house neat with little kids around...If you look closely at that last picture, you'll see what I mean about the power of selective cropping.

Do you want some more summer mantle inspiration?
Summer mantle ~ Blooming in the South
Bottles and blooms ~ Secret Notebooks
Vintage bottles ~ Secret Notebooks (again)
Summer mantle inspiration ~ Delightful Home

22 June 2009

How to Decorate Your Potty...

This post comes under the category of "I can't believe I'm writing this", but when I hosted Q&A Day on ASPTL, my reader, Beverly, asked "What's on the back of your toilets?". The question cracked me up and I told her I would turn her question into a post.

I fall into the category of utilitarian decorator when it comes to the potty. That means, no shaggy potty covers, no baskets of fake flowers, no bathing beauty figurines. For me, it's all about the essentials in that area of the house. And there's really only one essential when it comes to the potty. Toilet paper. Lots of toilet paper.

But practical and functional can still be pretty.

My first floor powder room has this lidded basket that I purchased from Pottery Barn at least 8 years ago. A few weeks ago, I dressed it up with a starfish..hot glued, of course.

And the upstairs bathroom has this $1.99 Goodwill basket that I dressed up with a big seashell.

The master bathroom is, by far, my favorite...It's a vintage milk basket that I've repurposed. Don't you think that it makes my TP oh-so-chic?

There you have it. The burning question has been asked and answered. Now let's talk potties. I've shown you mine. What's on the back of yours?

~~~~~~~~~~


Do you need some storage ideas for your bathroom? Check out these...

A peg rail behind the sink for extra storage ~ housetohome
A solution for kids and towels (Love this!!!) ~ Pretty Organized Palace
Control the clutter IN the shower ~ min hus
Medicine cabinet makeover with DIY instructions here ~ girl meets home
Bathroom bedlam with toilet paper modern art ~ Balancing Beauty and Bedlam


10 June 2009

Summer Decorating with What You Have


I was itching for a little summer spruce up (on the cheap) so I scavenged around the house (and dug through a few boxes) to find something things that I could use. Here's what I came up with:

  • Thrift store ironstone plates
  • Starfish
  • Seashells
  • Rattan balls

Yes, dear readers, I hot glued starfish to my ironstone plates. Wanna make somthin' of it?

If it makes you feel any better, I used a low-melt glue gun so they'll pop right off when summer's over. Side note: No starfish were harmed in the creation of this post. They were already dead.

And the seashells just kinda work with the rattan balls, don't you think? The seashells were left over from this project last summer. Don't feel like you have to click over because I'll probably be rehashing that project very soon.


And there you have it...a free summer spruce up. What kind of summery goodness can you dig up at your house?

~~~~~~~~~~

In a tragic episode of insanity, The Nester asked me to guest post at Nesting Place. I can only assume that her big move is making her delirious. If you're visiting from Nesting Place for the first time, welcome! Take a look around and make yourself comfortable.

If you're a regular reader, then please go read my guest post at Nesting Place to see my latest furniture rehab project.

~~~~~~~~~~


Remember! Party at my place next week! Link up your outside projects next Tuesday, June 16th!

10 May 2009

Decorating with Books

I found a new use for my beautiful, old china cabinet as a bookcase for my collection of favorite books that belonged to my beloved Grandpap.


Books aren't just paper and ink to me. They are memories. Their value goes far beyond the price on the jacket cover. (Which is why I'm rarely able to part with one.)


Memories of the people who gave them to me...
The grandparents who wanted to share their love of reading from the moment I was born...
Memories of the Grandpap who was almost entirely self-educated through his love of books...
Memories of easy times spent laying on the beach...
Memories of more difficult times when I sought help from the pages of a book...


Because of the glass front and the lighting, it's nearly impossible to get pictures without reflection or glare, so I opened up the cabinets so you can see inside.


Because of the shelves and vertical framing, I treated each section as an individual window.


What do you do with your books?

Related posts:
What my hutch used to look like
Family room redesign by Layla
Updating a sofa on a budget

~~~~~~~~~~


The winner of the $50 gift certificate from Dayspring is...Conny from The Heart of my "Haus". Congratulations! Email me and we'll get you set up.